Cloudflare - Converting to a managed tunnel
In this guide, we are going to convert from the 'old' style, login locally & configure locally cloudflare tunnel (formally called an Argo tunnel), to the new style, managed though the Cloudflare Zero Trust Dashboard tunnel.
Why?
Whilst im a fan of 'things as code', the ability to move the management of a tunnel to Cloudflare, instead of local code, allows the usage of Terraform to manage directly on the platform, thus improving our ability to manage the tunnel through code, with an actual IaC tool.
Additionally, the legacy method made popular by a few youtubers, whilst perfectly valid, is dependant on files on your disk to be present/set in the right way/permissions to function.
The new method is entirely stateless, and can be re-setup & configured remotely.
Step 1 - Create new tunnel on Cloudflare Zero Trust Dashboard
Login to your Cloudflare Zero Trust Dashboard
Once logged in, on the left, expand access, then click "Tunnels"

On the top right, click "Create a tunnel"

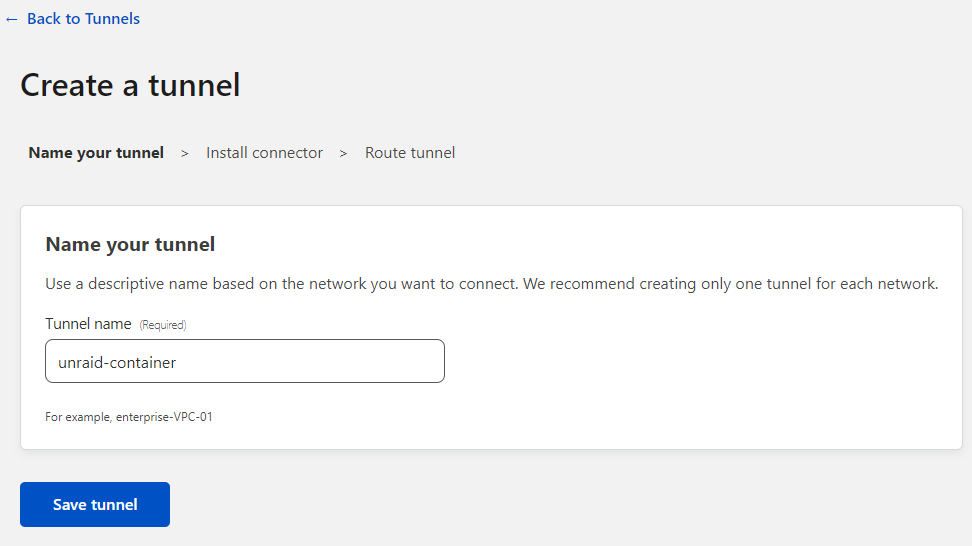
Give your tunnel a name, in this example, i am calling it unraid-tunnel, as its a tunnel, that i will be running on Unraid.
Then click Save tunnel at the bottom.
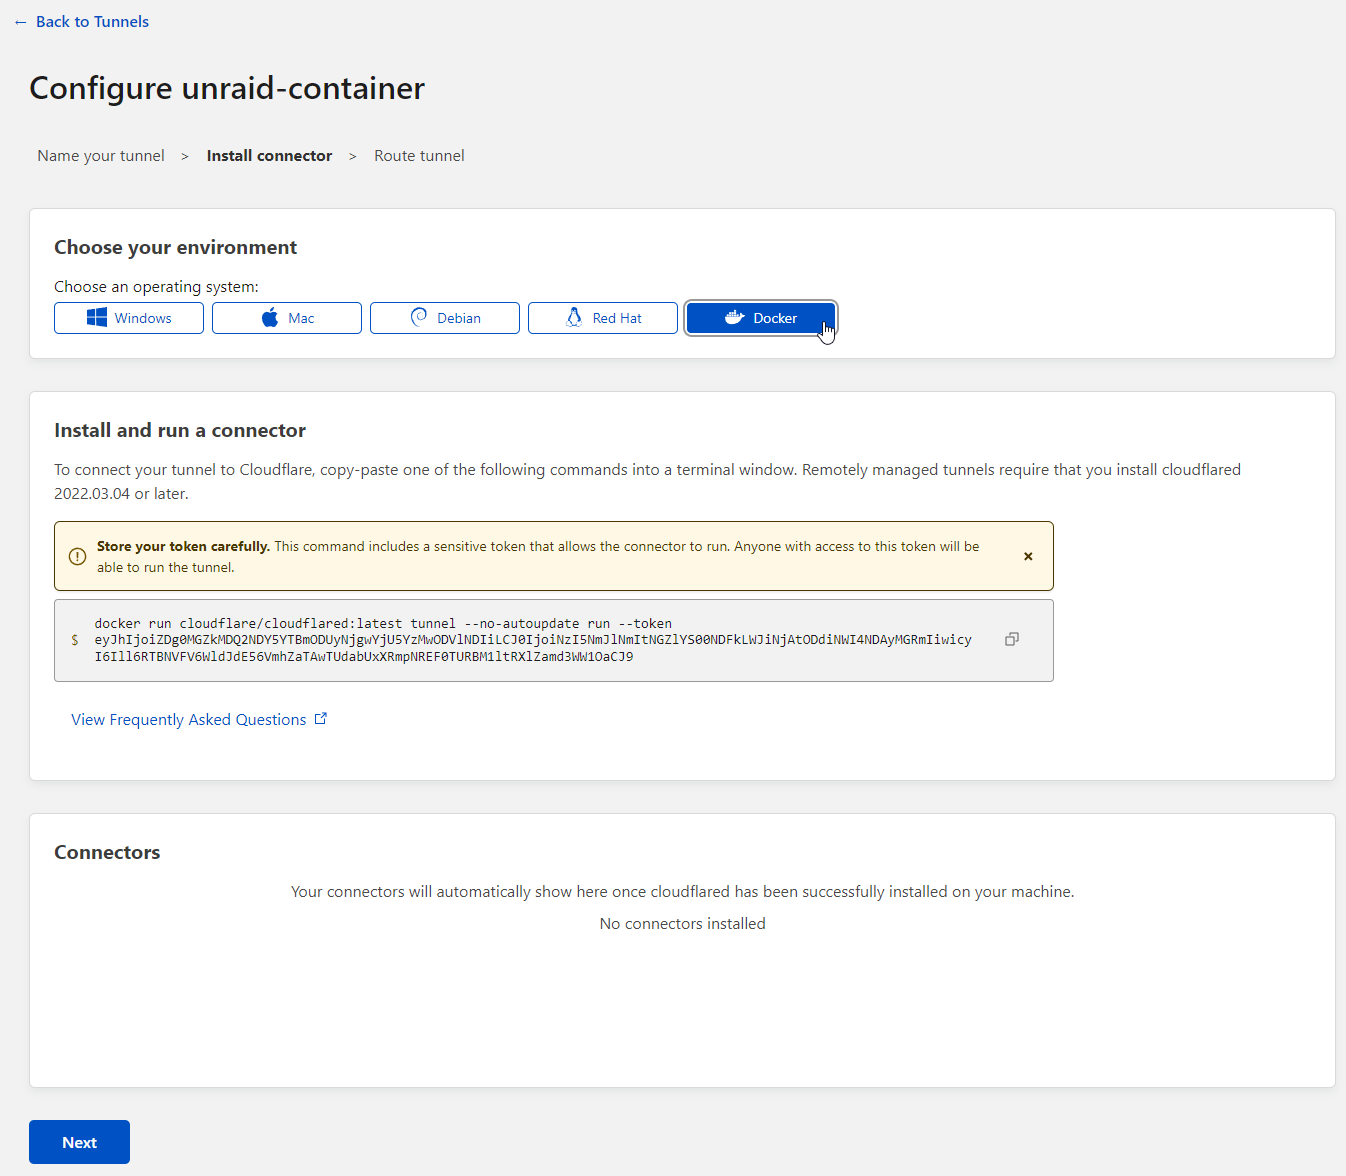
On this screen, under the Choose your environment section at the top, click Docker.
The area below, underneath Install and run a connector will change to show a docker run command.
Keep this page up, as will need the information from it.
Step 2 - Create tunnel container in Unraid
Login to your local unraid GUI, and click Docker.

At the bottom, click ADD CONTAINER

On this screen, we are going to create a custom container for the Cloudflare Tunnel.
Begin entering these settings on the main configuration page.
| Setting | What to enter |
|---|---|
| Name | cloudflare_tunnel_2 |
| Repository | cloudflare/cloudflared:latest |
| Network Type | Your local docker network - in my case, 'proxynet' |
Now, click the toggle in the top right that says BASIC VIEW, and toggle it to ADVANCED VIEW

On this screen, we need to add some additional variables -
| Setting | What to enter |
|---|---|
| Docker Hub URL | https://hub.docker.com/r/cloudflare/cloudflared/ |
| Icon URL | https://raw.githubusercontent.com/aeleos/cloudflared/main/cloudflare-icon.png |
| Extra Parameters | see below |
For Extra Parameters, we need to take the output of the cloudflare wizard, everything past "tunnel", but removing '--no-run-autoupdate'.
Running containers on the latest rolling releases vs sticking with a known working release is a popular difference of opinion for both self-hosters and big organisations alike.
For this deployment, i am recommending 'latest' as the release tag as a home lab is not critical in nature. If something breaks due to a bad update, it can be diagnosed.
You should however change this based on your personal viewpoint & preference.
Example -
tunnel run --token ABC1234567890
Once information has been inputted, click APPLY at the bottom of the page.

You should see 'the command finished successfully!' at the bottom of the deploy page if it was successfully downloaded/deployed.
Click DONE
If you now switch back to the tab for Cloudflare, you should see your new tunnel with the status Connected.

Click Next at the bottom of the page to continue.
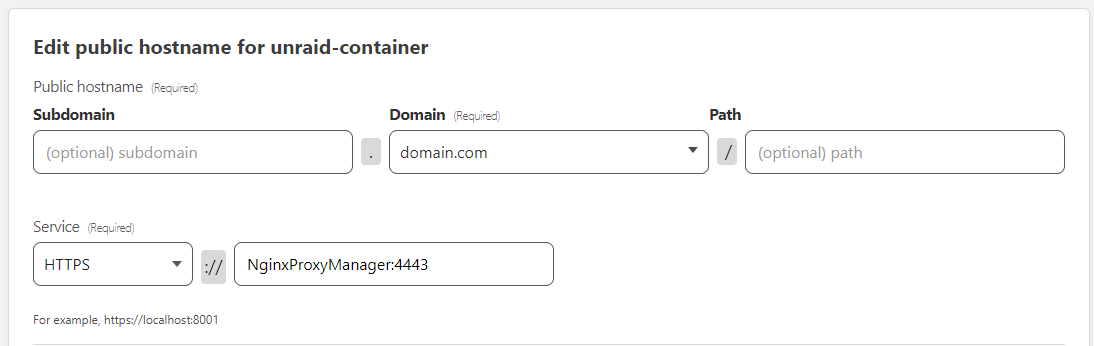
The next page is where we configure what we are routing and to where -
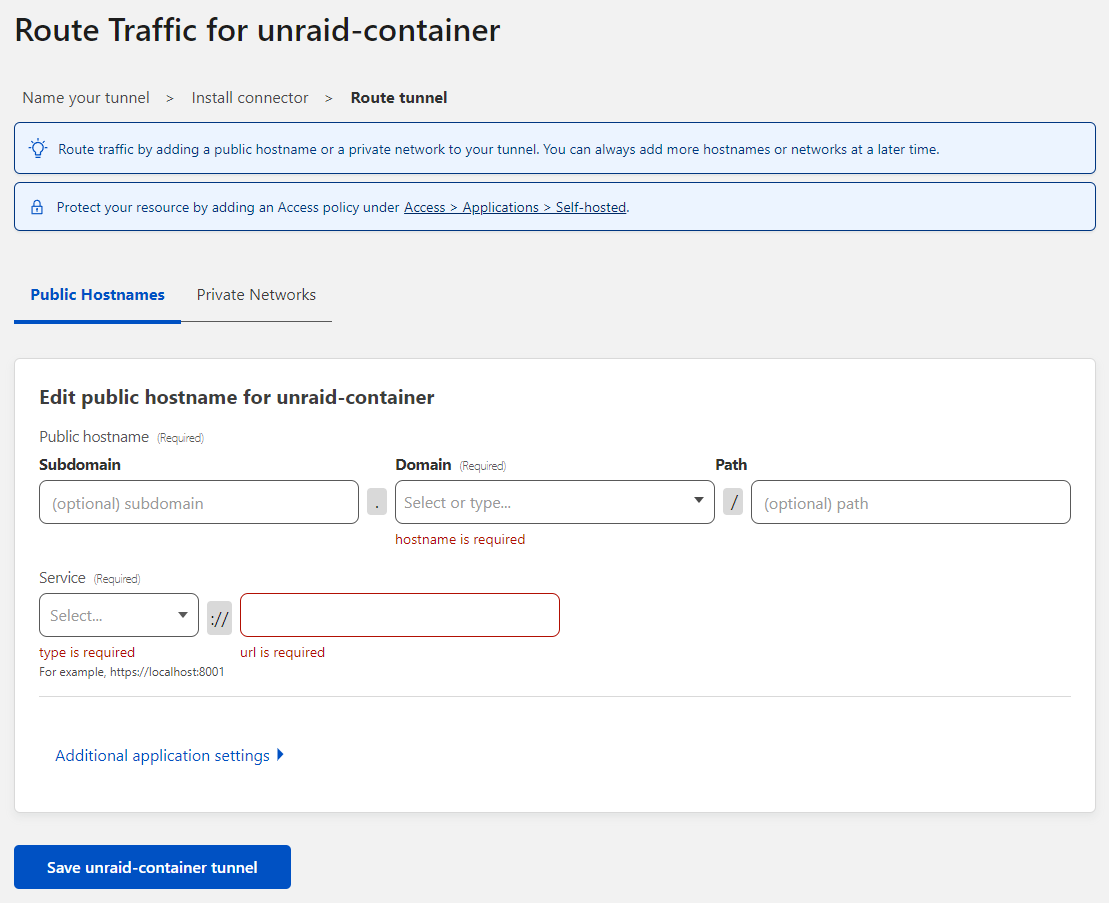
To pass everything that the tunnel receives to a proxy container (recommended), enter the following details -
| Setting | What to enter | Example |
|---|---|---|
| Subdomain | my-tunnel | n/a |
| Domain | Your domain name | domain.com |
| Path | Leave blank | n/a |
| Service Type | HTTPS | n/a |
| Service URL | containername:port | NginxProxyManager:4443 |
Click Save unraid-container tunnel
Done
At this point, you should point your tunnel CNAME's from wherever they are pointed (usually at your root @), to the new tunnel (my-tunnel.domain.com). This will allow you to quickly cut back to the original tunnel without taking it down should there be issues by just changing the CNAME target to @ again (or whatever it was before).
Getting the tunnel dns record to use
Tunnel DNS records are in the format of tunnel-id.cfargotunnel.com
You can get the tunnel ID from the tunnel status page, under the name.
